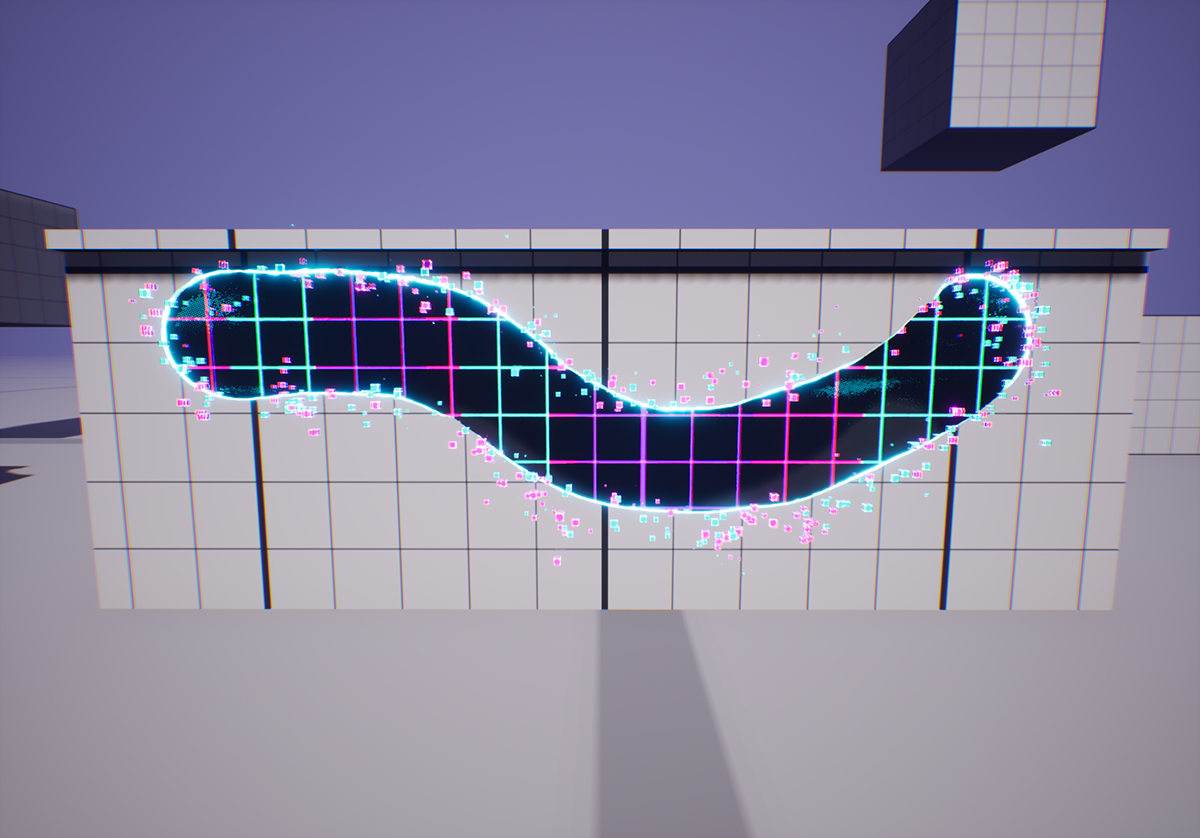
Digital Corruption
Vertex color Niagara System
Had the opportunity to create this visual solution to solve one of features of an upcoming project.
The objective was to design an effect that could be utilized by our environment artists, while also being able to be dynamically spawnable and fully integrated into the gameplay in run-time.
The effect primarily operates at the material level, utilizing a simple dynamic dissolve and two-sided materials. Additionally, I incorporated particle emissions along the borders of the corrupted areas to visually depict the corruption spreading through the assets.


Material Setup
The Material setup itself is a basic combination of simple workflows, mainly resolved within a single Material Function. Each asset can use their original material setup without any issues, the only input necessary is the vertex color (Red channel) to determine the corrupted areas.
By using a blueprint to dynamically assign essential parameters at runtime, this setup simplifies the integration of features into any assets

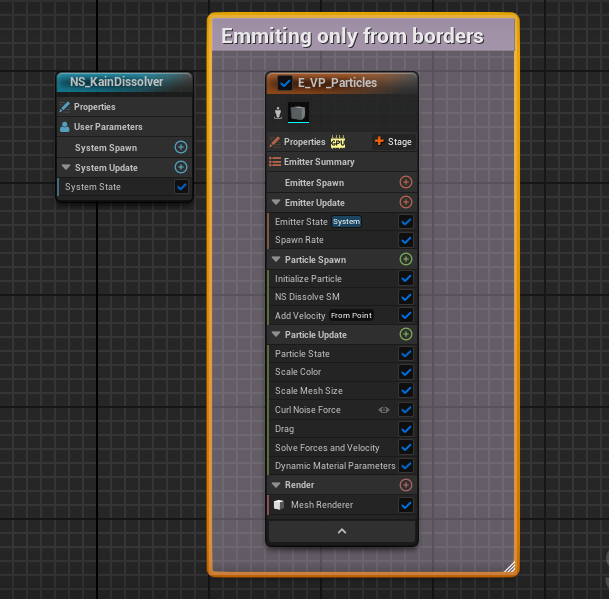
Niagara Setup
The Niagara setup is quite straightforward. Our objective was to spawn particles to enhance visual guidance and simplify the effect's perception from a distance, making it easier for the player to see.
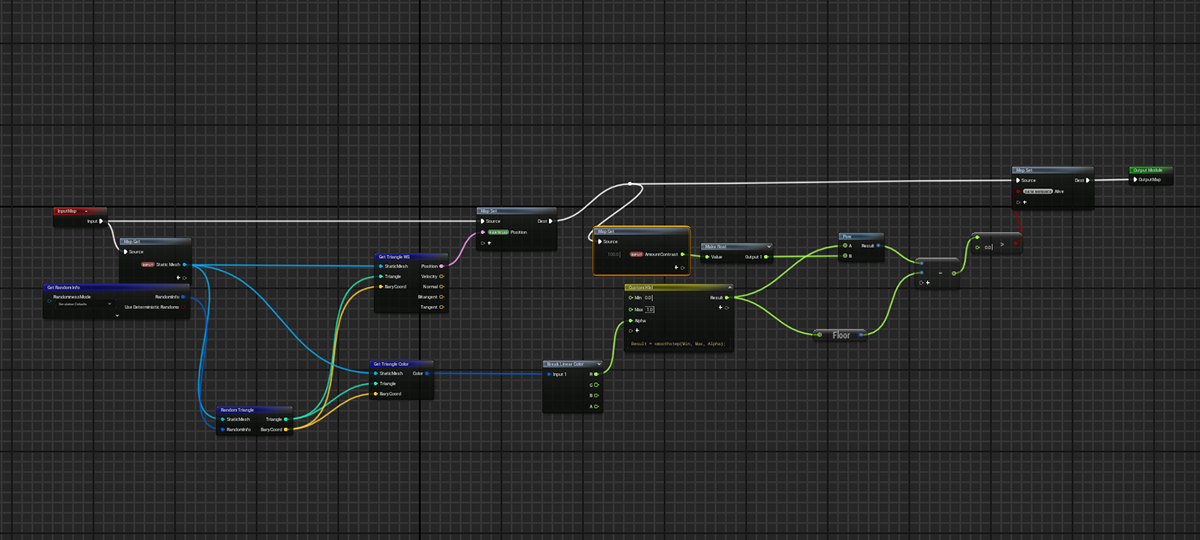
The spawning the of the articles on the borders were solved by using the static mesh module on the Niagara Module scripting, fetching the mesh vertex color and using a simple smooth step custom function to find and cull the particles spawned far from the masked area.

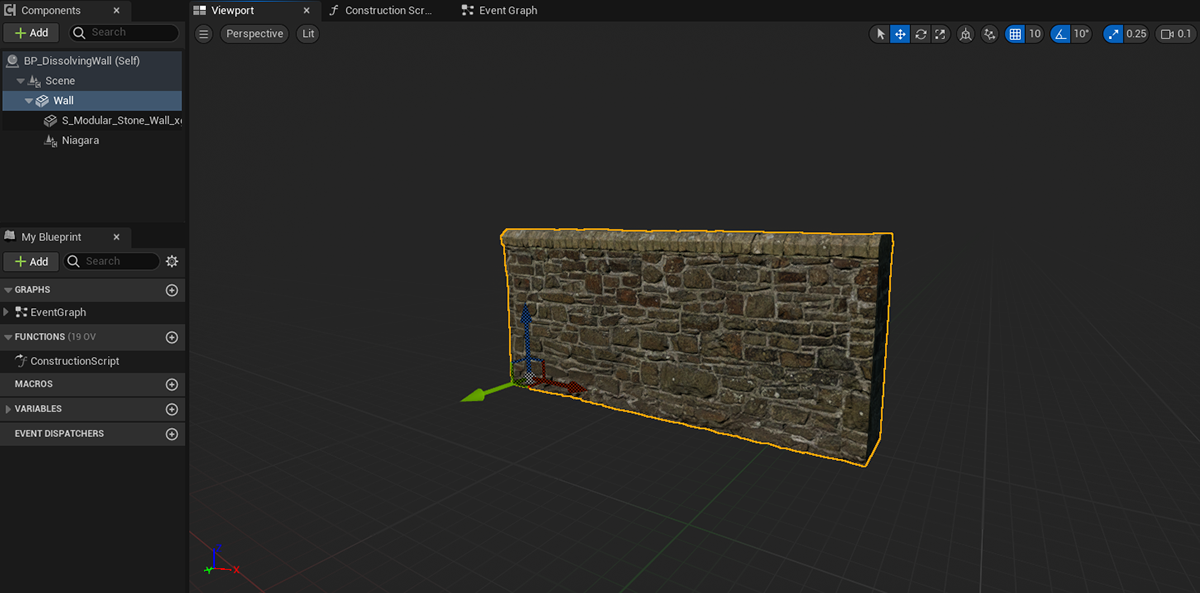
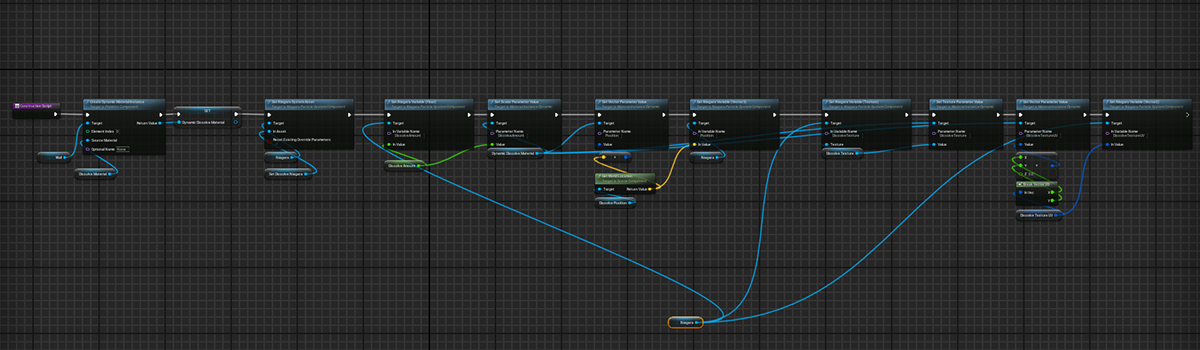
Blueprint Setup
Finally we tie-up everything together into a blueprint that allows for the dynamically assignation of the material and VFXs.
Pretty much all there's to be done for the user is to assign the mesh to be dissolved and its material, the rest is solved by the internal logic of the system.

Additional Credits:
VFX Muzzle package by BlueSlothVFX
Runtime Vertex Color Plugin by Alex River